What Happens During Veneer Placement: The Chairside Process in Spring Valley
What happens during veneer placement in Spring Valley, DC. Step-by-step chairside procedure. Specialty-trained prosthodontist Dr. Gerald Marlin.
Understanding what happens during veneer placement helps patients know what to expect and reduces anxiety about the procedure. The placement process involves systematic steps designed to ensure optimal fit, appearance, and bonding durability. Spring Valley patients benefit from understanding this chairside sequence.
Preparation Phase: Removing Temporary Veneers
The placement appointment begins with careful removal of the temporary veneers placed during the preparation appointment approximately two weeks earlier. Using specialized removal instruments, the dentist gently separates the temporary veneer from the tooth surface.
The amount of temporary bonding material remaining varies. Some patients have minimal residual material, others have more. The dentist carefully removes all temporary material without damaging the underlying prepared tooth. This phase typically requires 10 to 15 minutes per tooth.
After temporary material removal, the prepared tooth surfaces are cleaned thoroughly. Any remaining bonding remnants are removed. The tooth is polished to remove surface stains or deposits. The prepared surfaces are now clean and ready for final veneer bonding.
Try-In Phase: Verifying Fit and Appearance
The permanent veneers are carefully placed on the prepared teeth in sequence without any bonding material to verify fit and appearance. This try-in phase allows the dentist and patient to assess how the final veneers look before any permanent bonding occurs.
The dentist evaluates marginal fit, examining whether the veneer margin contacts the tooth at the designed depth. He assesses the contact tightness, confirming that the veneer sits flush against the tooth without gaps. He examines the veneer from multiple angles to ensure proper positioning and alignment.
The patient observes the veneers in a mirror, assessing shade match, size, shape, and overall appearance. Does the shade look as expected? Does the tooth size and shape appear harmonious with adjacent teeth and facial features? Are there any concerns about the result?
This try-in phase is crucial because it allows final verification before irreversible bonding occurs. Any concerns expressed during this phase can be addressed. If adjustments are needed, the veneer can be returned to the laboratory. If the patient is entirely satisfied, proceeding with final bonding is appropriate.
Etching and Bonding Preparation
Once the patient approves the veneer appearance and fit, the bonding phase begins. The tooth surface is first etched using a phosphoric acid solution. This etching creates microscopic pits in the enamel surface, increasing surface area and mechanical interlock for the bonding resin.
The etching solution is applied for a standardized time (usually 15 to 20 seconds), then thoroughly rinsed away. The prepared tooth must be completely dry for optimal bonding. Moisture contamination can compromise the bond and must be avoided.
Bonding Resin Application
A thin layer of bonding resin is applied to the etched prepared tooth surface. This resin flows into the microscopic pits created by etching and seals the tooth surface. A thin layer of veneer cement, selected to match tooth color, is then applied to either the tooth surface or the veneer itself.
The veneer is carefully positioned and seated on the tooth with controlled pressure. Excess bonding material is expressed to the margins and removed before hardening. The position and alignment are verified from multiple angles.
Hardening and Curing
Once the veneer is properly seated, the bonding material is hardened using a specialized blue light (light-curing). The light hardens the resin through a photochemical reaction. The curing light is applied for a standardized time (typically 20 to 40 seconds) to ensure complete hardening.
Multiple angles of light exposure ensure complete curing throughout the bonding interface. Under-cured bonding material can compromise long-term durability, so adequate curing is essential.
Margin and Contact Verification
After the bonding material has cured, the dentist verifies that no excess bonding material remains at the veneer margins. Using specialized instruments and careful visual inspection, any residual bonding material is removed. The margins are polished smooth.
The dentist confirms that the contact relationships between teeth are appropriate. Patients should not feel the veneer margin with their tongue or feel roughness at the contact point.
Bite Evaluation and Adjustment
The patient’s bite is evaluated with articulating paper to assess contact relationships. The patient bites on the paper, and contact marks are observed. Ideally, the new veneers contact evenly with opposing teeth at appropriate points.
If uneven contacts are noted, minor adjustments can be made by polishing the veneer surface. Significant bite problems are unusual if proper preparation and design occurred, but minor adjustments are common and expected.
Polishing and Finishing
The veneer surfaces are polished to create a lustrous, smooth finish. This polishing removes any micro-scratches created during placement and gives the veneer its final esthetic appearance. The gloss and light reflection should match natural teeth.
Patient Instruction and Care Guidance
Before the patient leaves, detailed instructions about care and normal sensations are provided. Patients are told that teeth may feel slightly sensitive for 24 to 48 hours as they adjust to the restored surfaces. This is normal and usually resolves quickly.
Patients receive guidance about avoiding hard foods for several hours while bonding material fully hardens. They are instructed to avoid extreme temperature foods or beverages for 24 hours. They receive information about normal oral care after placement.
Immediate Post-Placement Experience
Most patients experience minimal discomfort during or after veneer placement. Some notice slight temperature sensitivity for a few days, which usually resolves. Patients often feel unusual sensations as they explore their new veneers with their tongue initially, but this sensation normalizes quickly.
The new veneers feel like part of the natural smile within days. Patients quickly adapt to the restored surfaces and function normally. Most patients express satisfaction immediately and feel delighted with their new appearance.
For Spring Valley residents considering veneer placement, scheduling a consultation with Dr. Marlin provides the opportunity to understand the procedure and determine candidacy.
Elite Prosthetic Dentistry 4400 Jenifer Street NW, Suite 220 Washington, DC 20015 (202) 244-2101 Request a Consultation
For related care, see our pages on cosmetic dentistry and Veneers in Foxhall.
Frequently Asked Questions
How long does veneer placement take?
Veneer placement typically takes 60 to 90 minutes for a single veneer and up to 2 hours for multiple veneers. The time varies depending on the number of veneers being placed, the complexity of the bonding, and whether bite adjustments are needed. Patients should plan for the full appointment time.
Is veneer placement painful?
Veneer placement is typically well-tolerated to minimally uncomfortable. The tooth is already desensitized by temporary veneer placement during the previous appointment. Some patients experience slight pressure or vibration sensation during removal of temporary material, but this causes minimal discomfort. Local anesthesia is not usually necessary but can be provided if sensitivity concerns exist.
What happens immediately after veneer placement?
After veneer placement, teeth should not contact hard foods for several hours to allow bonding material to fully set. Patients should avoid very hot or very cold foods for the first 24 hours. Patients receive detailed care instructions and guidance about normal sensations they might experience as they adjust to their new veneers.
Can bonding material be seen at the veneer margin?
Quality veneer placement results in bonding margins that are essentially invisible to the patient or observer. The margin is positioned at or below the gumline where light does not reflect off it visibly. The shade of bonding material is matched to tooth color. Expert placement makes margins imperceptible.
What if a veneer doesn't fit properly during placement?
If a veneer does not fit optimally during final placement, Dr. Marlin can make minor adjustments chairside. Significant fit problems rarely occur because veneers are carefully evaluated in a try-in phase before final bonding. If adjustments cannot achieve satisfactory fit, the veneer can be returned to the laboratory for modification.
Related Patient Success Stories
Explore similar patient success stories demonstrating our expertise in advanced prosthetic dentistry.

Temporary Crowns Restore Patient's Smile in Just One Day with an Immediate Smile Makeover
A patient from Potomac, Maryland, came to Elite Prosthetic Dentistry with the chief complaint of pain from a failing dental implant and its significant impact on her appearance.
Multi-Faceted Treatment for Patient Unhappy With Her Artificial-Looking Crowns, Teeth and Gums
Many patients come to Elite Prosthetic Dentistry unhappy with the appearance of their smile. However, this particular patient presented with multiple interconnected problems that together created a smile she found deeply unsatisfying.

Treating Kevin's Collapsed Bite with a Complete Smile Makeover with New Dentures
Dentures are sometimes not created to the ideal aesthetic and functional scheme. When improperly fabricated, dentures can make an individual appear almost a generation older than their actual age. They can have a poor fit that feels loose and unstable when eating or speaking, and they can actually accelerate bone loss over time.

Salvaging Ms. N’s Severely Broken-Down Upper and Lower Teeth from Gum and Bone Disease
Many people in the U.S. suffer from extensive periodontal disease characterized by significant bone loss and shrinkage of the gum tissue. This condition can begin at a very young age and worsen quickly due to hereditary factors and lack of early diagnosis by their dentist.
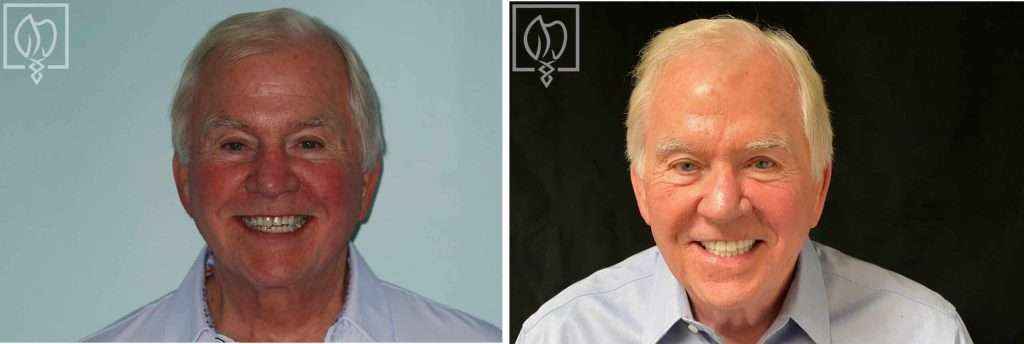
A Smile Transformation in Just Four Months: A Patient’s Dental Crown Restoration for a TV Series
A patient with dental crowns that were in poor shape was going to appear on a streaming video series on a major TV network that was scheduled to begin filming soon. Our patient, John, an author about to embark on a book tour, was anxious as his teeth were not up to his standards to appear on television.
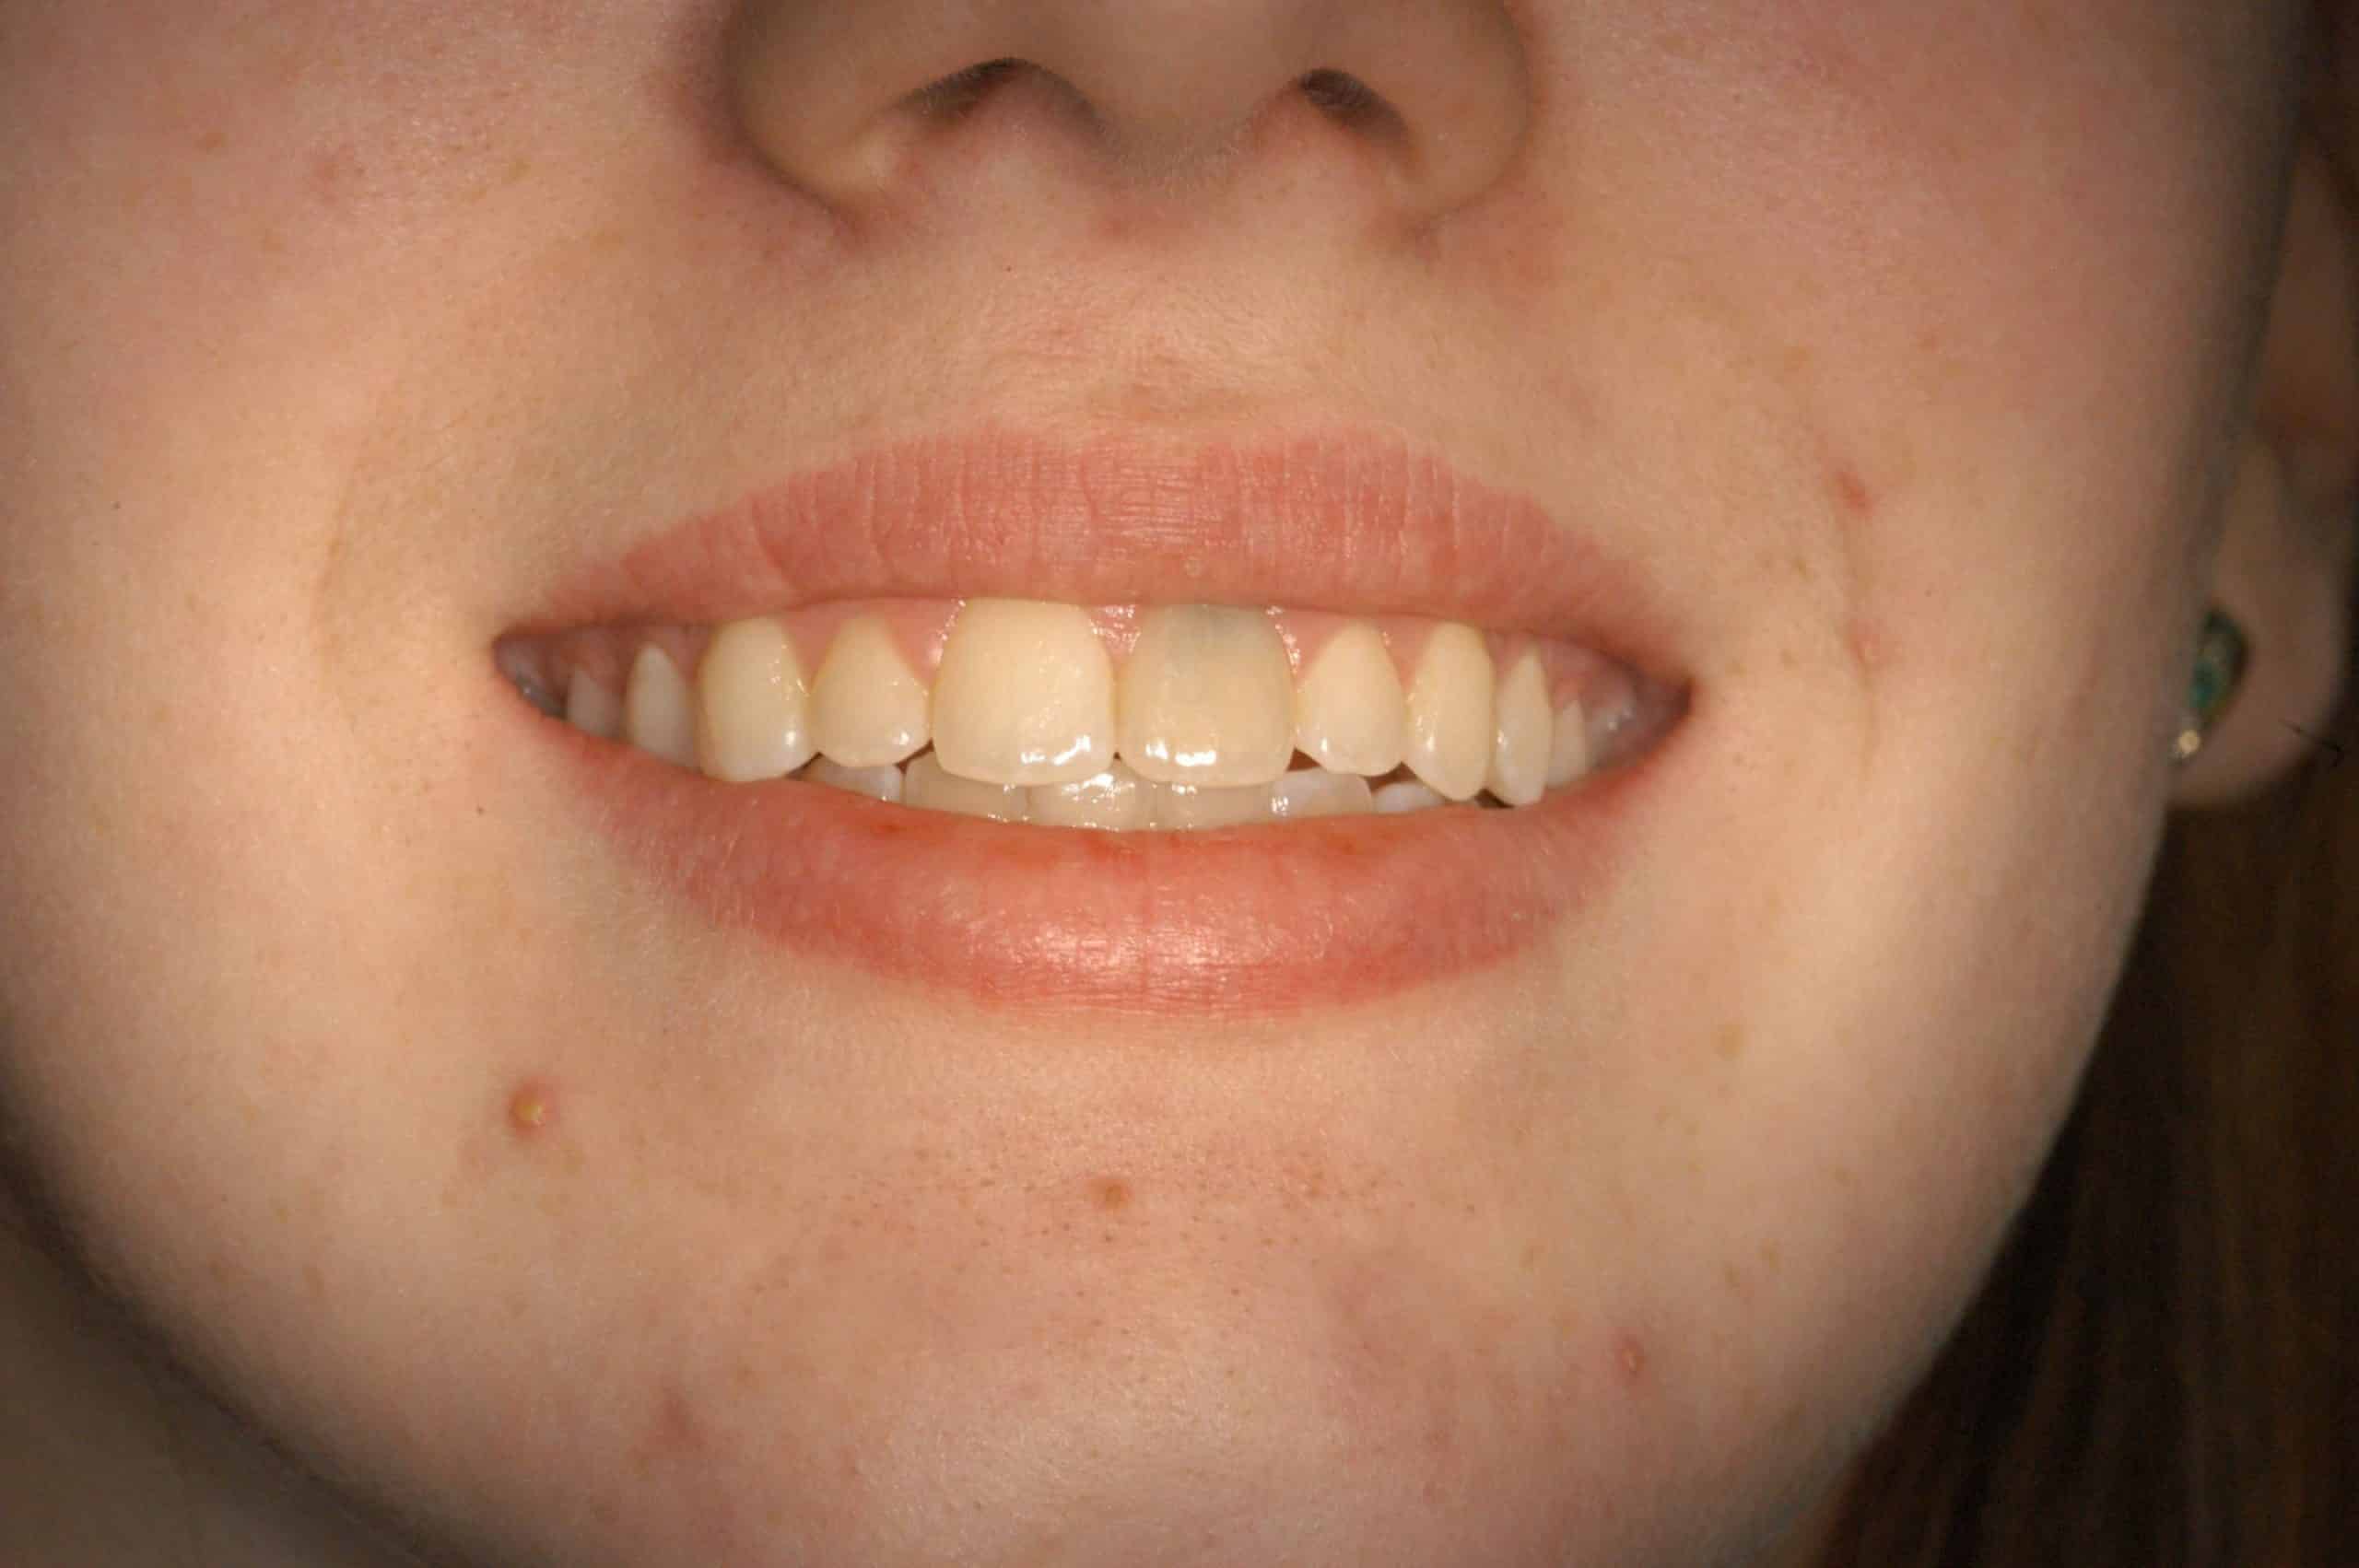
Replacing a Discolored Front Tooth with a Precision Placed Implant
Some of the most challenging restorations occur when fabricating an anterior crown to fit on an implant. Not only does one have the difficulty of matching the single front tooth to the other ones in the high visibility zone, but the dentist must also ensure the position of the underlying implant is precise through accurate preplanning and placement.
Our Services in Spring Valley
Beyond Porcelain Veneers, Spring Valley patients rely on Dr. Marlin for a full range of advanced dental care.
Getting Here from Spring Valley
Elite Prosthetic Dentistry is conveniently located near Spring Valley, DC.
From Spring Valley, drive east on Massachusetts Avenue NW directly to the Friendship Heights office at 4400 Jenifer Street NW, Suite 220.
Address:
4400 Jenifer Street NW, Suite 220
Washington, DC 20015
Phone: (202) 244-2101
Request a ConsultationRequest a Specialist Consultation from Spring Valley
Spring Valley residents come to Dr. Marlin for specialist prosthodontic care. With 3,900+ implants placed and restored over 40+ years, evaluation, planning, and execution are handled with the depth complex cases require.